


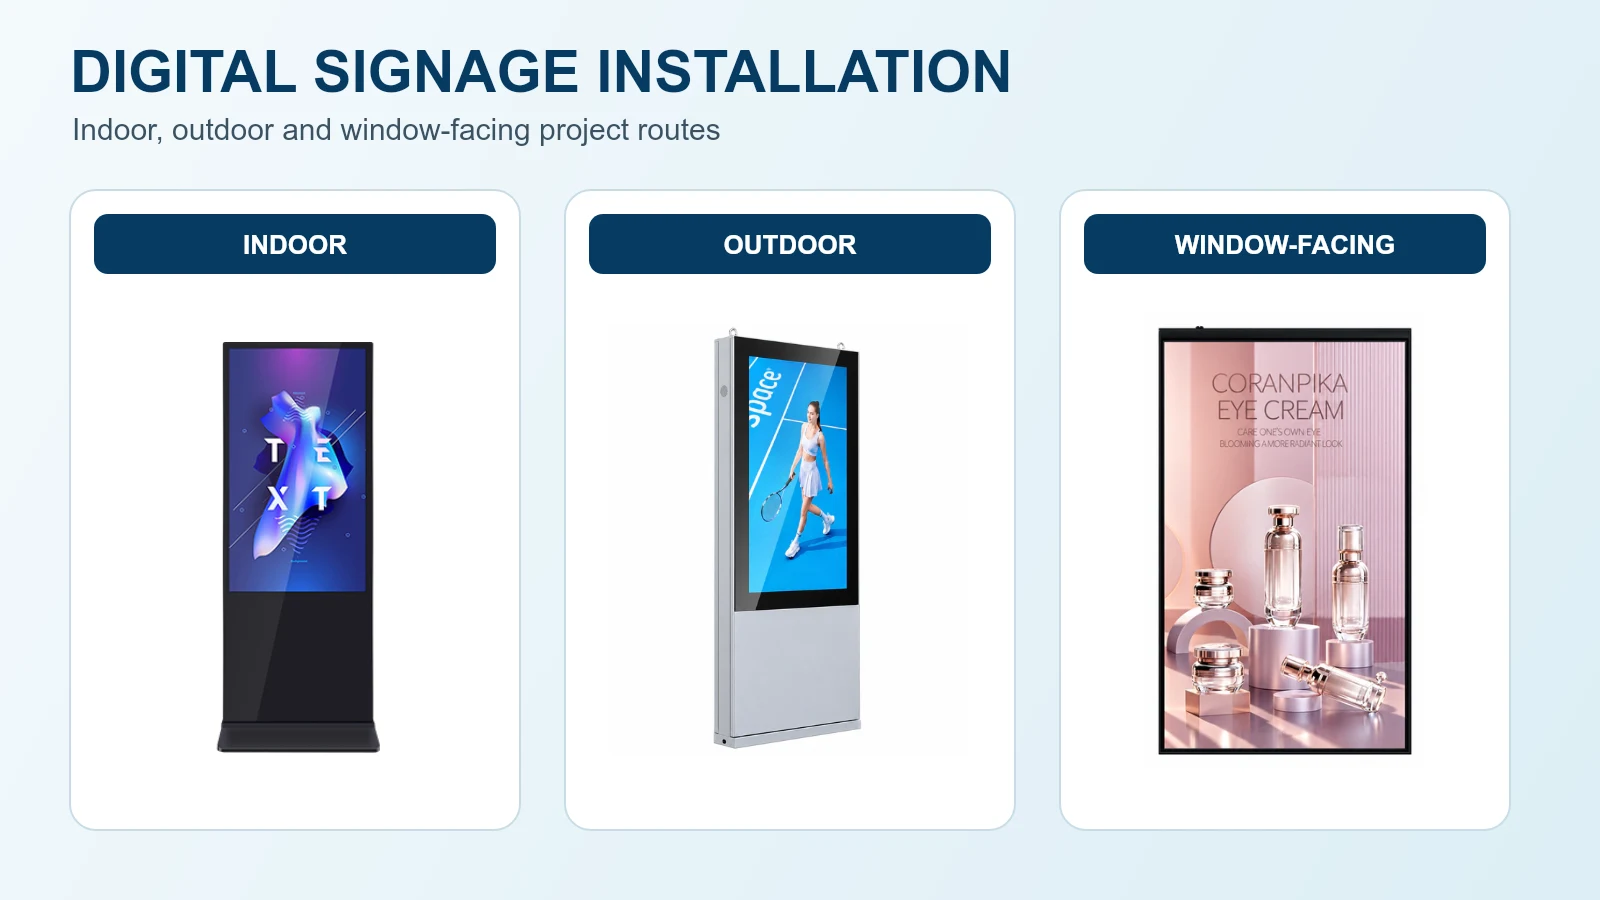
What Does a Digital Signage Installation Include?
A complete digital signage installation connects the physical display, supporting structure, power supply, network, media player or operating system, content source and ongoing maintenance plan.
Mounting the screen is only one part of the work. A display may be securely installed but still fail acceptance testing because the network is unavailable, the orientation is wrong, ventilation is restricted, content does not restart after a power interruption, or the service door cannot be opened.
Typical installation workstreams
- Site and structural work: location, floor or wall condition, support structure, anchoring, lifting access and service clearance.
- Electrical work: supply voltage, load, isolation, protective devices, grounding and cable routing.
- Display hardware: enclosure, screen orientation, thermal system, glass, locks and optional peripherals.
- System setup: signal source, standalone player, Android or Windows system, network and customer-selected software.
- Commissioning: display, sound, touch, peripherals, content playback, connectivity, restart recovery and documentation.
- Handover: keys, account responsibility, manuals, photos, configuration records and maintenance access.
Complete a Site Survey Before Installation
The site survey should be completed before the product configuration and installation drawing are frozen. Photos are useful, but they do not replace dimensions, exposure information or a review of the supporting structure.
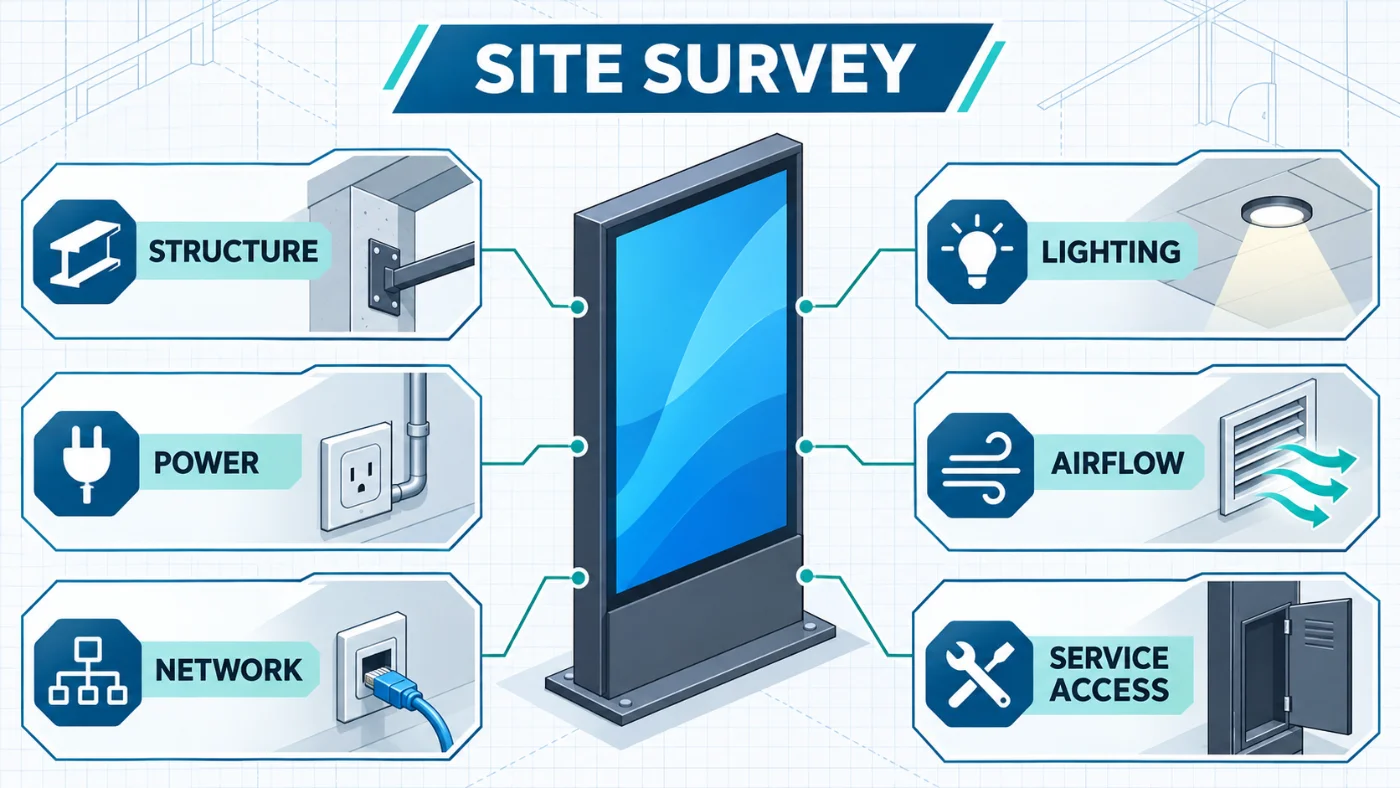
Record the installation environment
- Indoor, covered, window-facing or directly exposed outdoor location
- Installation city and expected temperature range
- Direct sunlight, reflected sunlight and window orientation
- Rain, dust, humidity, salt, pollution or public-contact exposure
- Viewing distance, direction and pedestrian circulation
- Accessibility and operating-height requirements
Inspect the support and access route
- Floor construction, level and finished surface
- Wall material and available structural support
- Ceiling structure where a suspended display is planned
- Door, lift and corridor dimensions along the delivery route
- Loading, lifting and temporary storage arrangements
- Space for opening doors, changing filters and removing service panels
Confirm utilities and system interfaces
- Available voltage, frequency, circuit capacity and isolation point
- Grounding and surge-protection requirements
- LAN, Wi-Fi or mobile-network availability
- Player, operating system and CMS responsibility
- Required peripherals, including touch, camera, printer, scanner or card reader
- Content resolution, orientation, audio and scheduled operating hours
For outdoor or public-space installations, the survey should also identify foundation drainage, cable-entry protection, wind exposure, vehicle impact risk and the need for local permits or structural approval.
Choose the Correct Installation Route
The product form factor does not determine the complete installation method. A floor-standing unit may be a movable indoor totem, a fixed indoor kiosk with peripherals, or a heavy outdoor cabinet that requires a reinforced foundation.
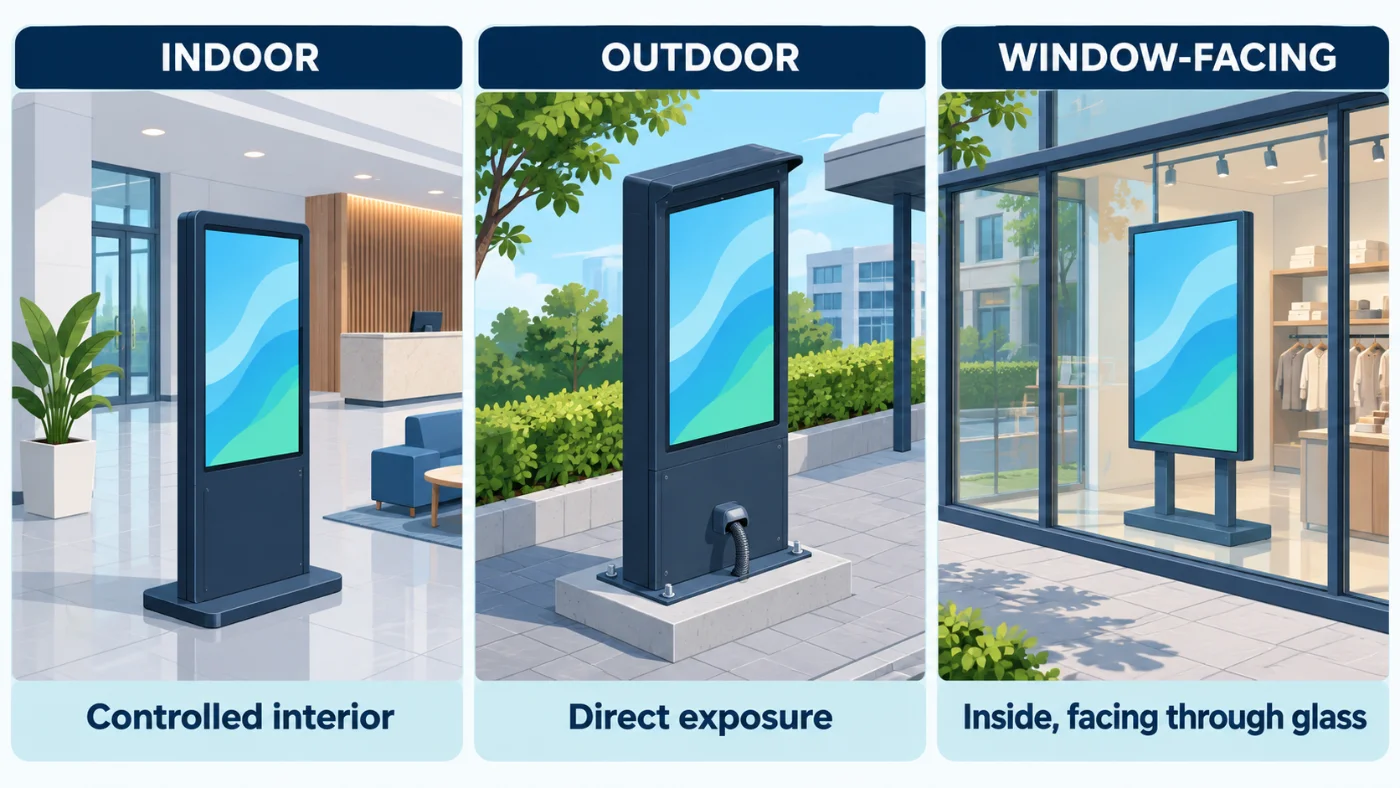
| Installation type | Typical location | Primary installation questions | Do not assume |
|---|---|---|---|
| Indoor floor-standing | Store, lobby, mall, airport or restaurant | Stability, floor level, cable access, ventilation and maintenance clearance | That every freestanding cabinet can remain unanchored |
| Outdoor freestanding | Street, plaza, transit area or public-information point | Foundation, anchoring, drainage, sealed cable entry, lifting and thermal system | That one foundation drawing applies to every size and configuration |
| Outdoor wall-mounted | Facade, external wall or outdoor structure | Wall capacity, bracket, anchors, wind, lifting, rear clearance and service method | That a general-purpose wall can support the display |
| Window-facing | Retail storefront or glass-facing indoor area | Brightness, reflection, solar heat, distance from glass, airflow and suspension support | That a high-brightness window display is waterproof outdoor hardware |
Plan Delivery, Unpacking and Handling
Confirm the packed dimensions and weight before dispatching the installation team. Large digital-signage cabinets may require a loading dock, pallet truck, forklift, lifting equipment or a temporary traffic-control plan.
- Inspect the crate for impact, water exposure or incorrect orientation before accepting delivery.
- Move the packaged unit using the marked handling points and supplied instructions.
- Do not lift the equipment by its glass, display face, door, trim or cable openings.
- Keep the cabinet supported while removing transport fasteners and packing materials.
- Check the model label, orientation, keys, cables, brackets, fasteners and project-specific accessories.
- Photograph damage or missing items before installation alters the condition of the equipment.
The installer should review the equipment manual and approved drawing before the unit is moved into its final position. If the planned route, lifting method or support structure differs from the approved installation, stop and request a technical review.
How to Install Indoor Floor-Standing Digital Signage
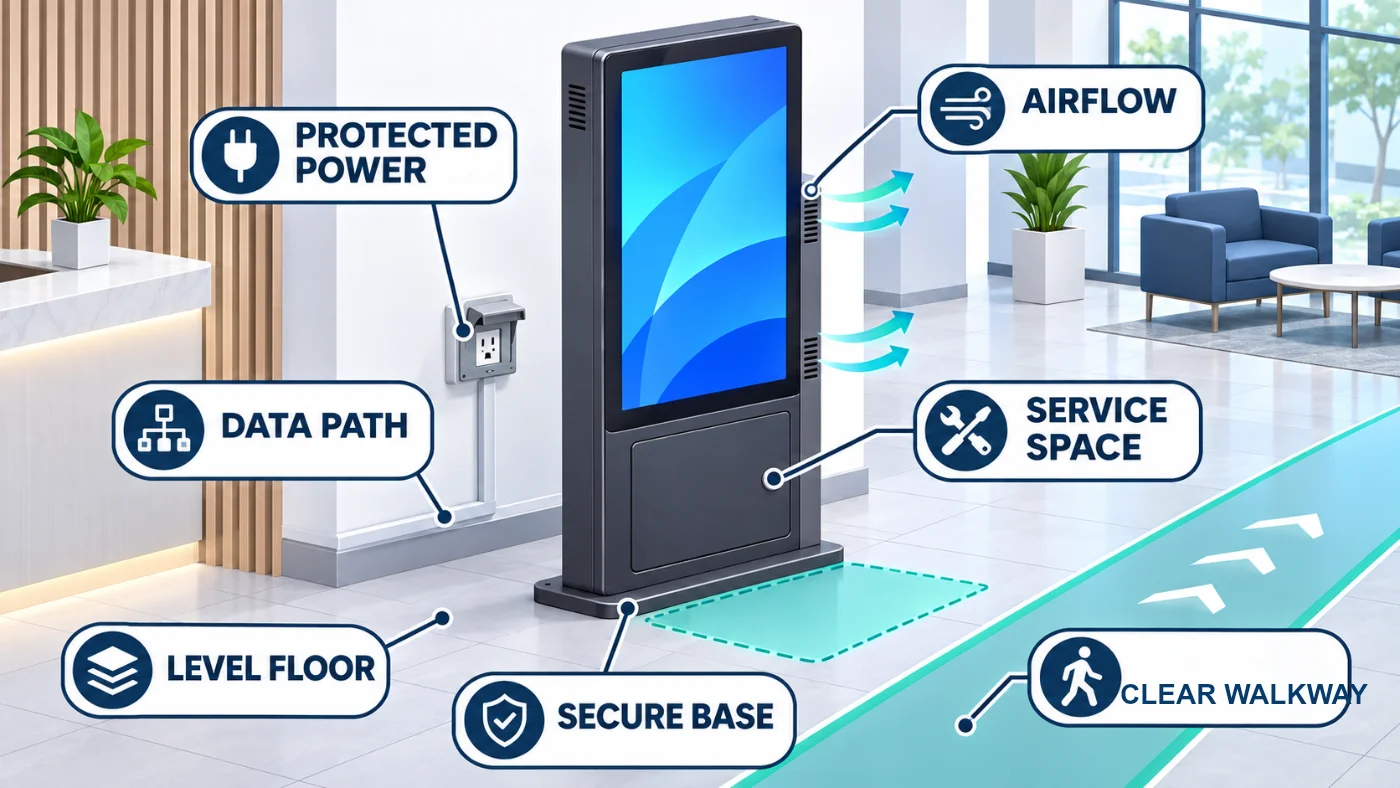
Indoor floor-standing displays are generally simpler to deploy than outdoor kiosks, but they still require a stability review, safe cable routing and service access. The final method depends on the cabinet design, screen size, optional wheels, touch interface and integrated peripherals.
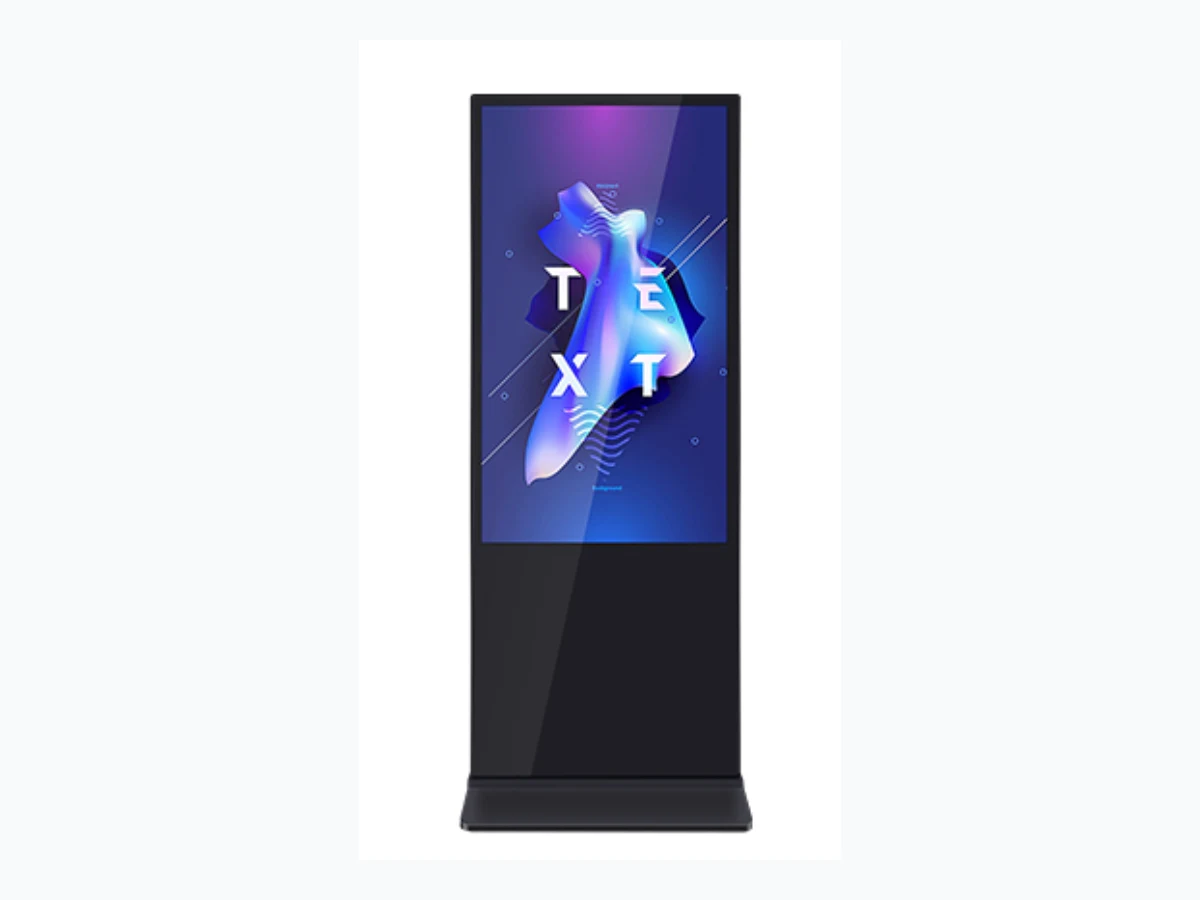
Indoor floor-standing installation sequence
- Confirm the supplied configuration. Check the model, screen size, orientation, operating system, touch option and accessories against the order.
- Inspect the final position. Confirm the floor is level and that the display will not obstruct doors, emergency routes or normal pedestrian movement.
- Review stability. Follow the supplied manual and project risk assessment to determine whether the unit requires anchoring, an anti-tip provision or another approved restraint.
- Protect the cables. Route power and network cables through the designed cable path. Do not leave loose leads across a walking route.
- Maintain airflow. Keep ventilation openings clear and preserve enough space to open locks, doors and service panels.
- Connect the system. With the supply isolated, connect the approved power, signal, network and peripheral cables.
- Complete the startup checks. Test the display, orientation, sound, touch and content before releasing the area.
Additional checks for self-service kiosks
A self-service terminal may include a printer, scanner, camera, payment device or other project-specific peripherals. Verify that each peripheral has the correct mounting position, interface, driver and maintenance access. Load paper, scan a test code and complete a representative customer workflow before handover.
Do not describe an indoor kiosk as a complete ordering or payment system unless the required application, payment services and integrations are included and tested.
How Outdoor Freestanding Digital Signage Installation Differs
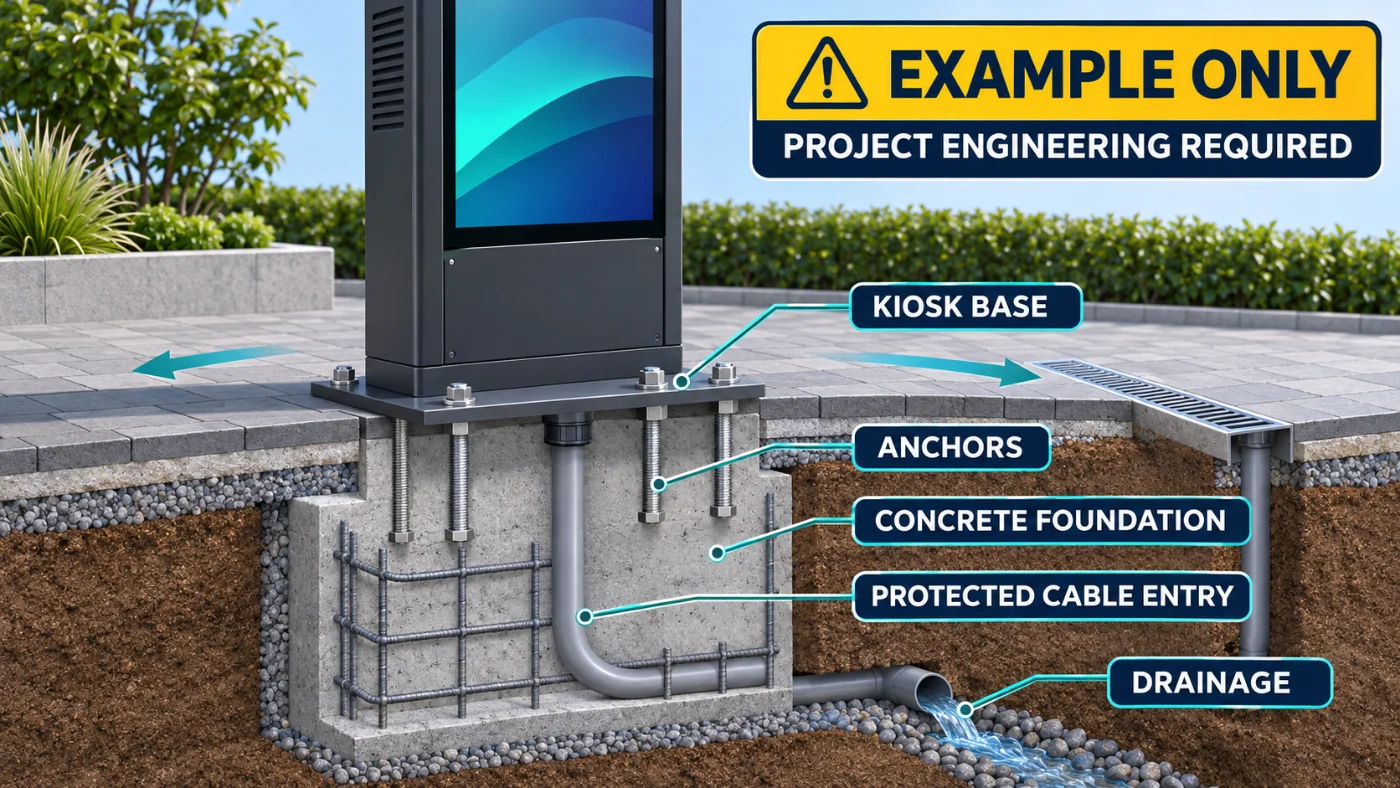
Outdoor installation adds civil work, environmental sealing, thermal management and public-safety considerations. The foundation, cabinet orientation and cable entry must be designed as one system.
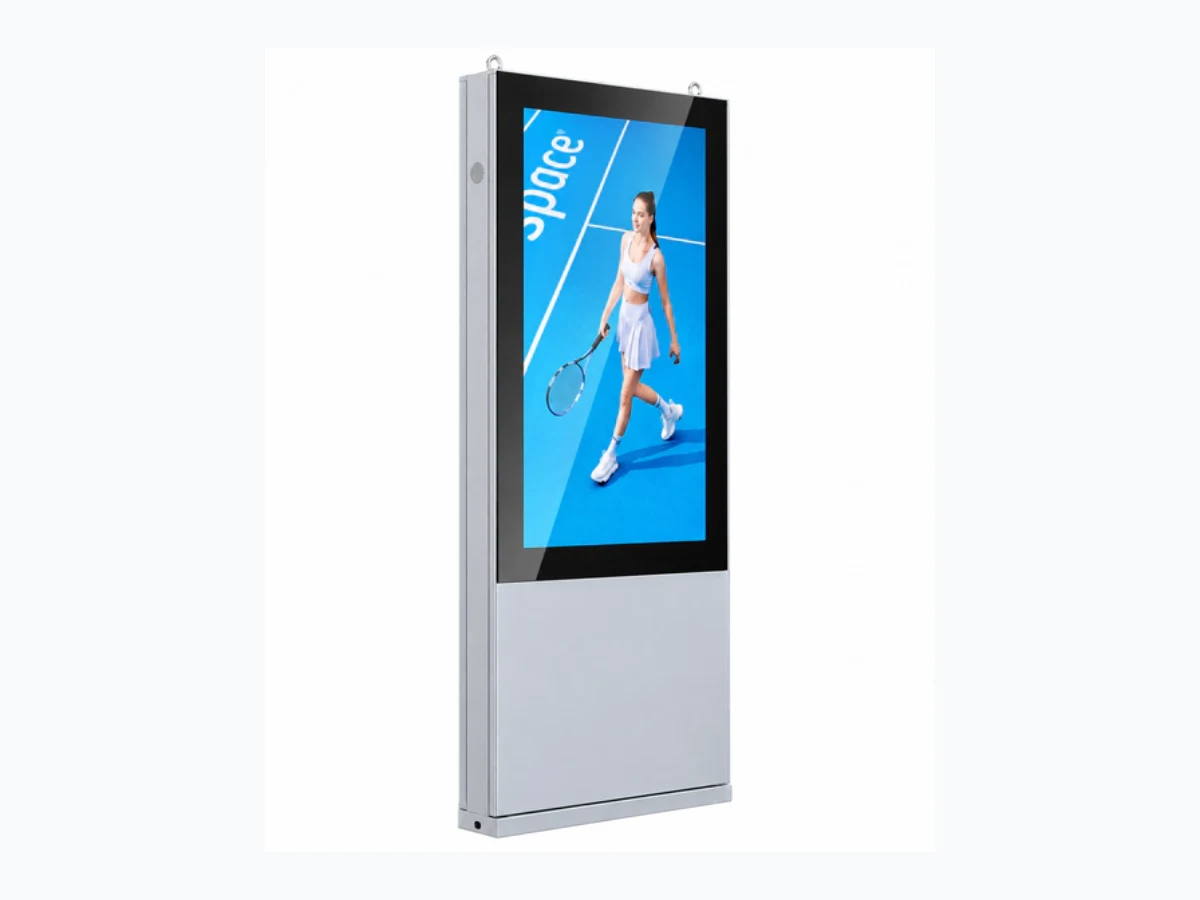
The F130P is a configurable outdoor floor-standing platform. Foundation, cooling and electrical requirements must match the approved project specification.
1. Approve the project drawing
Confirm the screen size, portrait or landscape orientation, cabinet version, foundation interface, cable-entry position, cooling system and maintenance direction before civil work starts. A drawing for one size or enclosure version should not be reused for another configuration without approval.
2. Construct and verify the foundation
The responsible structural or civil team should design the foundation for the equipment, site and local conditions. Verify dimensions, level, reinforcement, anchor positions, conduit positions and drainage before the concrete work is accepted.
3. Prepare protected cable routes
Power and data conduits should enter through the designated cabinet opening. The route should avoid standing water and allow the required cable bends and terminations. Seal the final cable entry using the approved project method so that it does not compromise the enclosure protection.
4. Lift and position the cabinet
Use the designated lifting points and equipment selected for the packed and unpacked weight. Keep personnel clear of the suspended load. Align the base with the approved anchors without using the glass or doors as pushing or lifting points.
5. Anchor, connect and seal
Tighten the specified anchor system using the approved sequence and torque information. A qualified electrician should complete the power, grounding and protective-device connections. Network, sensor, drainage and thermal-system connections should follow the configuration supplied for the project.
6. Check the thermal system and drainage
Confirm that air inlets, outlets, filters and drains are unobstructed. Air-conditioning and refrigerant work should be completed only by qualified personnel following the supplied HVAC instructions. Do not power a configured cooling system before its installation checks are complete.
How to Plan an Outdoor Wall-Mounted Installation
An outdoor wall-mounted display transfers equipment weight and environmental loads into the building structure. The visible wall finish alone does not prove that the wall can support the display.

Outdoor wall-mounted displays require a project-specific structural interface and protected power and data entry.
- Confirm the wall construction, structural support and allowable attachment points.
- Review equipment weight, centre of gravity, bracket loads and site wind conditions.
- Use only the approved bracket, anchors, lifting points and installation sequence.
- Provide safe access for lifting and prevent personnel from working below the suspended display.
- Maintain the required rear, top and side clearances for airflow and service.
- Seal wall penetrations and cable entries without blocking drainage or ventilation.
- Confirm whether maintenance is front-access, rear-access or requires removal of the display.
The installer should not select wall anchors from product weight alone. Anchor choice also depends on the wall material, edge distances, bracket geometry, dynamic loads, corrosion conditions and local structural requirements.
How to Install Window Digital Signage
Window-facing displays are installed inside a storefront or building and present content through glass. They may require higher brightness and window-oriented thermal management, but they should not be treated as waterproof outdoor displays unless the selected product is specifically approved for direct outdoor exposure.
Assess the window conditions
- Record the direction of the window and the hours of direct or reflected sunlight.
- Check reflections from the street, interior lighting and opposite buildings.
- Confirm the viewing direction and whether content is required on one or both sides.
- Review solar heat gain and the available room cooling.
- Preserve the product-specific distance from the glass and required airflow path.
Choose the mounting method
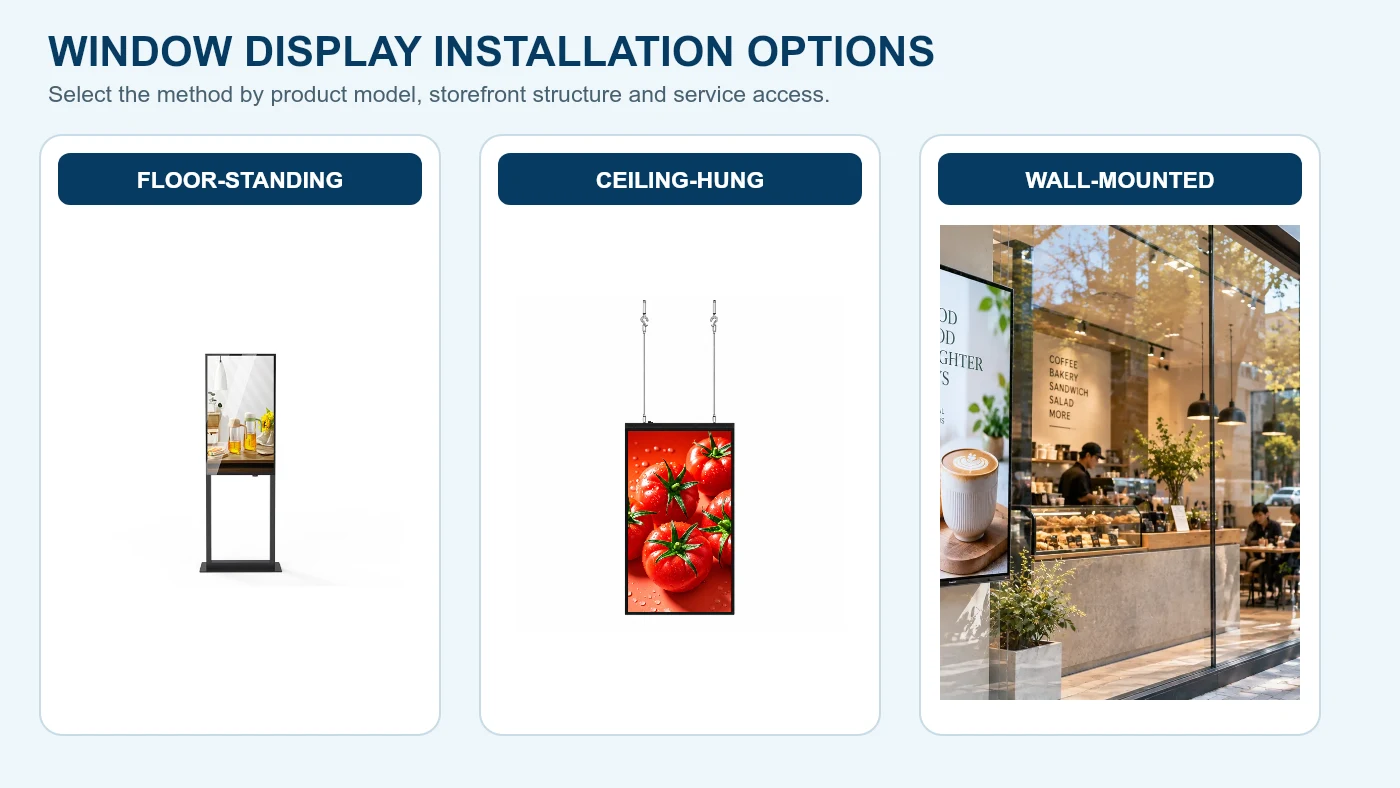
The U1500P window display is listed with floor-standing or hanging installation options. The UW1500L window display is positioned for wall-mounted or ceiling-hung installation. Final supports, brackets, suspension points and clearances must be confirmed for the selected size and project.
Prevent heat and service problems
Do not press the display against the glass or enclose it in decorative joinery without reviewing the thermal path. Keep sensors, air inlets and outlets unobstructed. Position locks, connections and service panels so that the display can be maintained without dismantling the storefront.
Where a display is suspended, the building structure, suspension hardware and secondary safety measures should be reviewed by the responsible local professional. Do not attach the load to decorative ceiling material.
Power, Grounding and Cable Routing
Electrical work should be completed by qualified personnel according to the equipment label, approved electrical drawing and local code. Do not apply a wire colour, plug type or voltage from one project to a global installation.
Electrical checks
- Confirm supply voltage, frequency and maximum project load.
- Provide the required isolation, overcurrent, leakage and surge protection.
- Verify protective grounding before energising the cabinet.
- Keep power and signal cables separated where required by the project design.
- Protect cable routes against abrasion, water, impact and unauthorised access.
- Label the circuit and isolation point for maintenance personnel.
Network checks
- Test the LAN connection at the final display position.
- Measure Wi-Fi or mobile-network performance where wireless connectivity is planned.
- Confirm DHCP, static IP, proxy, firewall, VPN and port requirements with the client’s IT team.
- Define who supplies and manages SIM cards, network accounts and remote-access credentials.
- Do not leave default passwords in service after commissioning.
Set Up the Media Player, Network and CMS
Digital-signage hardware may use a basic driver board, standalone playback, Android hardware, a Windows PC or an external media player. The appropriate setup depends on the purchased configuration and the customer’s software.
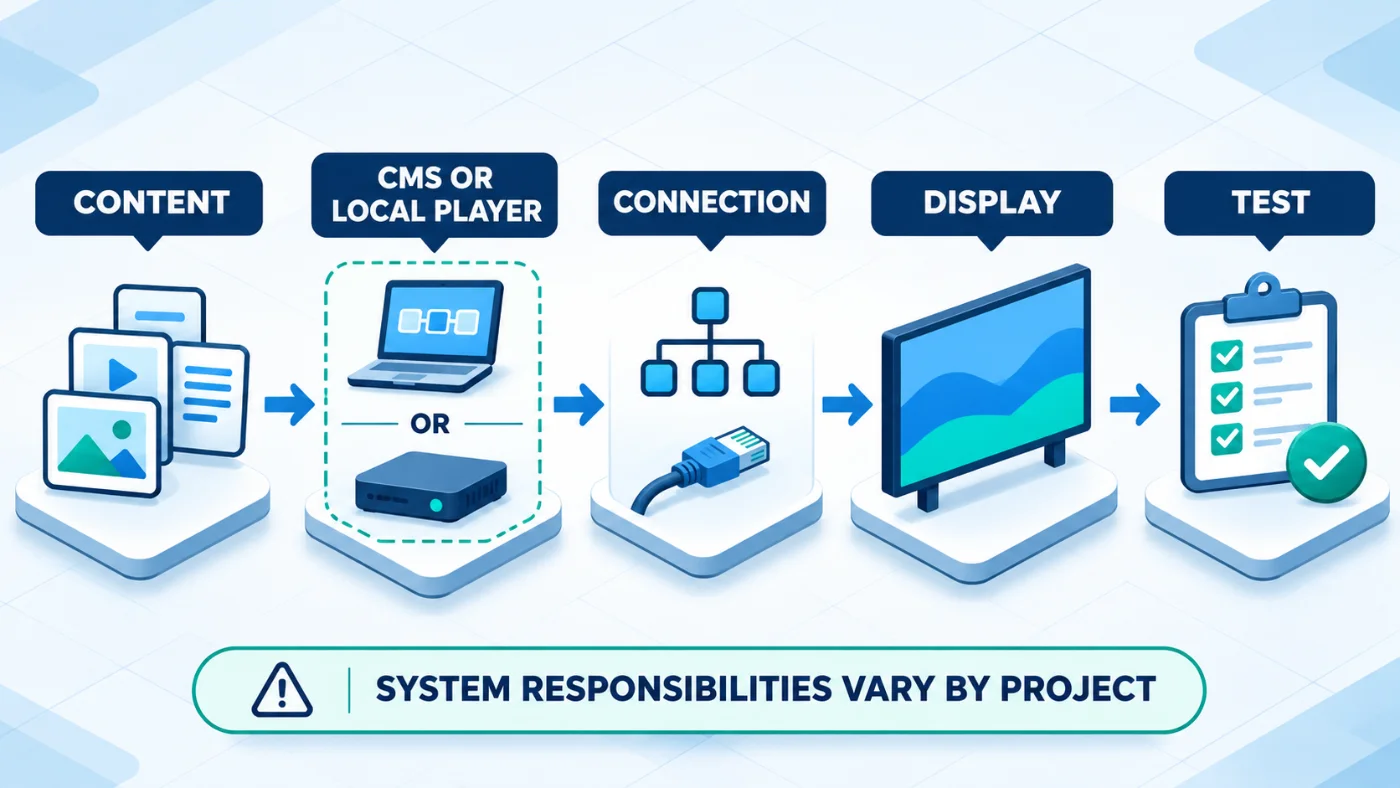
- Identify the source. Confirm whether content comes from USB storage, an internal Android or Windows system, an external player or another signal source.
- Set the display. Configure input, resolution, orientation, date, time zone, audio and the required power-on behaviour.
- Connect the network. Apply the approved LAN, Wi-Fi or mobile-network configuration and verify access to required services.
- Install or enrol the player. Follow the selected software provider’s instructions for account registration, device naming and licence assignment.
- Publish test content. Check image, video, web or interactive content in the final portrait or landscape layout.
- Test recovery. Restart the player and simulate an approved power-recovery test to confirm that the device reconnects and resumes the intended content.
- Record ownership. Document who manages the CMS, network, credentials, content schedule and software updates.
Commissioning and Acceptance Testing
Commissioning should verify the physical installation and the full operating workflow. A screen displaying a test image is not enough to prove that the system is ready for handover.
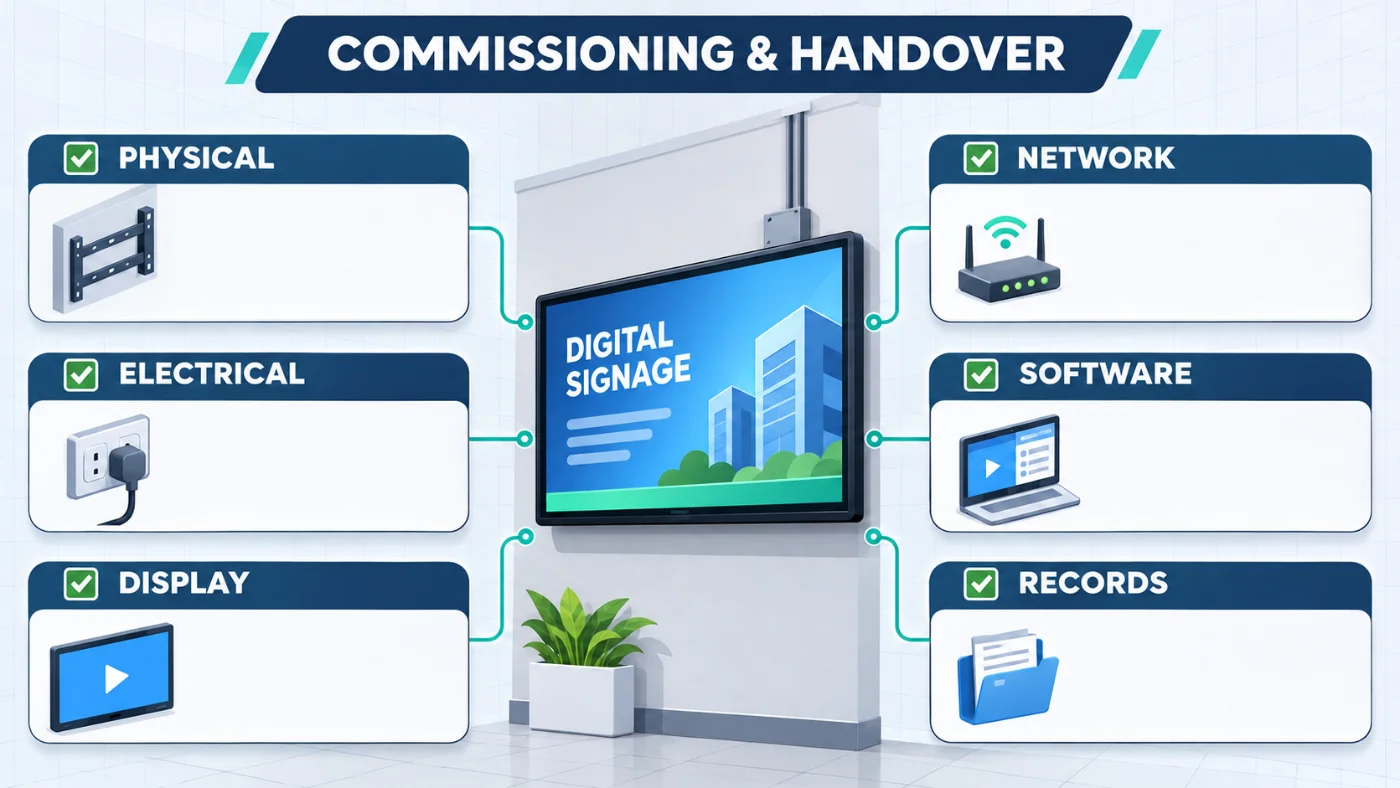
Physical and structural checks
- Cabinet position, level, orientation and stability
- Anchors, brackets and visible fasteners checked against the approved installation
- Doors, locks, panels and maintenance areas accessible
- Ventilation, filters, drains and cable entries unobstructed
- No damage to glass, enclosure, seals, paint or connectors
Electrical and functional checks
- Supply, protection and grounding verified by the responsible electrician
- Display starts without abnormal noise, smell, heat or error indication
- Brightness, colour, orientation, input and audio checked
- Touch alignment and intended gestures tested when touch is included
- Camera, printer, scanner, reader or other peripherals tested when supplied
Content and network checks
- Correct device name and network identity recorded
- Test content displays at the intended resolution and orientation
- Schedules, time zone and automatic start behaviour checked
- Remote content update tested when included in the project
- Restart and reconnection behaviour confirmed
Record the final configuration, test results, photos, open issues and responsible party for each outstanding action. Do not mark the installation complete while a required structural, electrical, network or application test remains unresolved.
Maintenance and Handover
Handover should give the operator enough information to use the display safely and arrange appropriate service. Maintenance intervals depend on the equipment, environment, operating hours and selected thermal system.
Handover package
- Model, serial number and final location
- Approved product specification and installation drawing
- Electrical and network information permitted for the operator
- Keys, remote controls and supplied accessories
- CMS or player account owner and support contact
- Commissioning checklist and completion photos
- Cleaning and maintenance instructions
- Outstanding work, exclusions and escalation path
Routine inspection topics
- Glass and enclosure condition
- Loose, damaged or corroded visible hardware
- Blocked ventilation or excessive dust
- Filter, fan, air-conditioning and drain condition where applicable
- Abnormal noise, heat, condensation or water entry
- Content playback, network connection and system storage
- Touch and peripheral operation
Use the model manual and project service plan to set inspection and replacement intervals. Outdoor and window-facing equipment may require more frequent inspection where dust, heat, sunlight or moisture exposure is high.
Digital Signage Options by Installation Method
| Installation requirement | Product direction | What to confirm |
|---|---|---|
| Indoor floor-standing display | S-UT1900 indoor floor-standing kiosk | Size, orientation, system, touch, wheels or restraint, cable route and maintenance access |
| Outdoor foundation-mounted kiosk | F130P outdoor digital signage kiosk | Foundation, IP configuration, brightness, cooling, cable entry, power and drainage |
| Outdoor wall-mounted display | V130L outdoor wall-mounted display | Wall and bracket structure, anchors, wind, lifting, cable sealing and service direction |
| Portrait window display | U1500P semi-outdoor window display | Floor-standing or hanging method, brightness, glass distance, airflow and solar exposure |
| Landscape window display | UW1500L high-brightness window display | Wall-mounted or ceiling-hung method, structural support, orientation, heat and service access |
For a broader comparison, review the outdoor digital signage range and window digital signage range. Final availability and specifications depend on the approved project configuration.
Documented Digital Signage Installation Examples
The following projects demonstrate different installation contexts. They confirm the application, location and hardware format; they do not establish universal installation specifications or quantified business results.
- Indoor floor-standing: a 65-inch indoor digital totem installed at the entrance and along the aisles of a German supermarket.
- Outdoor freestanding: an 86-inch outdoor digital advertising kiosk installed on a Spanish city street.
- Ceiling-hung window display: a 65-inch high-brightness display installed at a hardware-store window in Sweden.
- Semi-outdoor window display: a 55-inch display installed behind a Belgian retail storefront window.
- Shelter-integrated outdoor display: a 65-inch outdoor kiosk integrated into a public bus-stop environment in the Netherlands.
See the Uniview LCD case-study library for the available field-deployment records.
Common Digital Signage Installation Mistakes
- Selecting the display before surveying sunlight, weather, wall or floor conditions
- Using an indoor or window-facing display in a directly exposed outdoor location
- Copying a foundation or mounting detail from another screen size
- Blocking ventilation with joinery, glass or decorative panels
- Leaving no safe route to open a door or replace a filter
- Routing loose power or network cables across a public walking area
- Assuming that hardware purchase includes a CMS, licence, content or network service
- Testing only the display image and not restart, network, touch or peripheral workflows
- Handing over the equipment without keys, records, responsibilities or maintenance instructions
Frequently Asked Questions
Does every floor-standing digital signage display need to be bolted to the floor?
No universal answer applies. The requirement depends on the cabinet design, screen size, base, wheels, location, public-contact risk and supplied installation instructions. Outdoor freestanding kiosks commonly require an engineered foundation and anchoring, while an indoor unit may use a different approved stability method.
Can an indoor digital-signage totem be installed outdoors?
No. Indoor equipment should not be exposed to rain, outdoor dust, direct solar load or uncontrolled temperature conditions. Use a dedicated outdoor configuration selected for the actual site exposure.
Is a high-brightness window display waterproof?
Not necessarily. A window-facing or semi-outdoor display is normally installed inside a building and faces outward through glass. High brightness does not prove that the enclosure is approved for direct rain or outdoor exposure.
Who should install outdoor digital signage?
The project may require qualified civil, structural, lifting, electrical, HVAC and system-integration personnel. The required trades and permits depend on the equipment, location and local regulations.
What power supply does a digital-signage display require?
Use the voltage, frequency and load shown on the supplied equipment label and approved electrical documentation. Do not apply the electrical specification or wire colours from another project.
Does Uniview LCD hardware include a CMS?
A CMS should not be assumed. Available hardware may use driver-board, standalone, Android, Windows or external-player configurations. CMS licensing, hosting, configuration and content operation must be confirmed in the approved project scope.
What should be tested before handover?
Check the physical installation, power and grounding, display quality, orientation, audio, touch, peripherals, content playback, network connection, scheduled operation, restart recovery and maintenance access. Record the results and any unresolved actions.
What information should I provide before requesting a digital-signage quotation?
Provide the installation city, indoor or outdoor exposure, mounting method, screen size, orientation, sunlight and weather conditions, power, network, player or CMS interface, required peripherals, quantity and expected project schedule. Site photos and drawings are also useful.
Discuss Your Digital Signage Installation
Share the site environment, installation method, preferred screen size, orientation, power and network conditions, system requirements, quantity and destination market. Uniview LCD can review the hardware direction and identify the items that require project-specific confirmation.